Technology extends to all aspects of our lives from smart phones to firearms. Changes make their way to bullet drop compensation when shooting long distances as well.
The advancements in firearms are evidenced by the latest genre of rangefinders, weather meters, and rifle scopes which can seamlessly communicate for pinpoint placement of shots at previously unheard of distances.
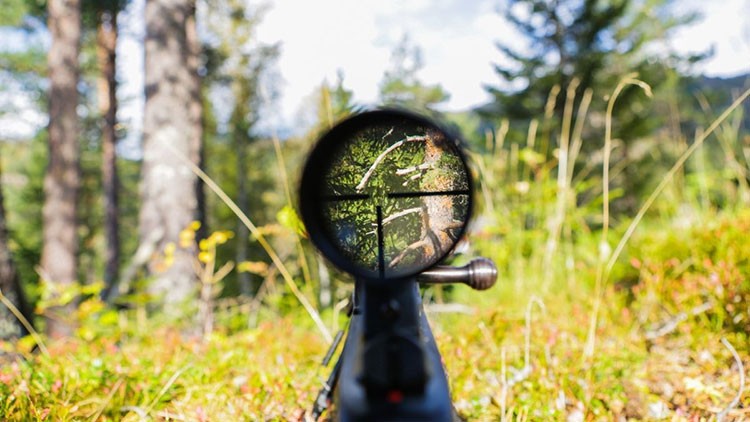
Gone are basic crosshairs or duplex-type reticles that laid game low for decades. A look through the latest tactical marvels will reveal a complex aiming grid that more closely resembles a Christmas tree.
Most gun owners in my area couldn’t care less. Although many of them own rifles, the majority are bolt-actions, pumps, or autoloaders in well-proven deer calibers like .30/06, 30/30, etc. These tried and true guns often sport scopes, but most are basic fixed 4Xs or 3-9X variables with a basic reticle like the duplex (a variation of common crosshairs).
Table of Contents
Bullet Drop Compensation and the Average Hunter
The few days prior to deer season sound more like a war zone as 100-yard zeros are confirmed atop truck hoods. These people are hunters more than shooters. Fiddling with scope turrets is scrupulously avoided unless absolutely necessary. Still, most are perfectly capable of filling their freezers on an annual basis.
Our Northern New England action typically occurs in thick woods at less than 100 yards. Still, longer shots are a possibility. A classic is the appearance of a big buck at 300 yards in a powerline. The range is sometimes computed by counting poles. The most ethical decision could be to pass on the shot. But, with a good rest, known distance and the right shooting solution, it could be doable.
But I’d rather start with a simpler example. The following involves a modern air rifle. However, it could as easily be a .22 rimfire or a centerfire by changing the numbers.
Duplex Scope and Pigeon Perforation
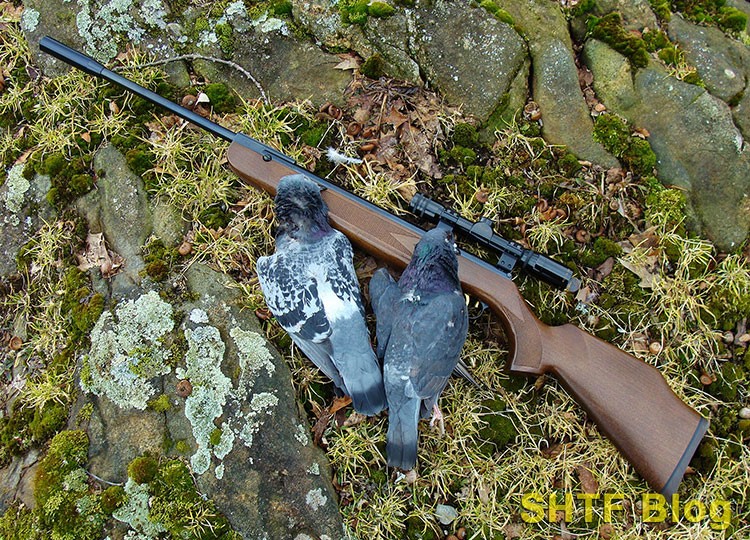
I was wrapping up a morning of indoor pigeon control when a lone straggler landed on an adjacent barn roof at fifty yards. This shot presented a challenge because I was using a mid-powered (700 fps) Beeman R9 .22 air rifle, equipped with a small Burris 6X scope. I’d sighted it in for 30 yards and, inside that distance, it was perfect for the task at hand. A 50-yard shot was a stretch, but unfortunately for this latecomer, I’d done some homework.
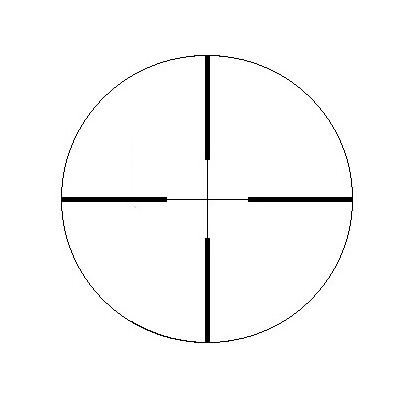
The scope had a typical duplex reticle, consisting of crosshairs with thick outer portions that transition to thin inner lines. Using a fence post as a makeshift rest, I elevated the crosshairs above the pigeon until the terminus of the thick lower “post” coincided with the vitals of the pigeon. A careful squeeze of the trigger sealed the deal with a puff of feathers.
Work with the Scope in Advance
I’d taken the time to shoot a few groups with this loopy airgun at 40 and 50 yards. My target was an eight-inch steel plate, large enough to record hits. While continuing to aim dead-center, I squeezed off five supported shots in calm conditions.
At 40 yards the group formed 1 ½-inches below the crosshairs, still close enough for hits on pest-bird size targets using a “guesstimated” hold-over.
At 50 yards the impacts dropped 3-inches below the crosshairs. That’s enough to make guesstimation iffy. But, as it turned out, the group coincided nicely with the lower duplex juncture. I gained a low-budget “ballistic reticle” for the price of a few shots.
And, yes, it was a coincidence – sorta. This scope was a fixed 6X, but what if it was a variable of, say, 3-9X? If so, it would almost certainly be a second-focal plane type (2nd FP) common to the U.S. sporting market. If its power-selector was changed, the reticle size would remain consistent – but, the target’s size would increase or decrease with the magnification. Hold this thought for now so we can revisit the fixed 6X.
Mad Duplex Science
Assuming my shots didn’t coincide with the duplex tip at 50 yards (more than likely), they would at some other distance. We could use a couple methods to figure out where.
Trial and Error
Assuming your rifle is properly zeroed, affix a target to a portable backer like a box, or just back up. A small distinct aiming spot on a plain white background should work with optics clear enough to resolve your bullet holes. BUT, instead of aiming with the Duplex tip, center the spot in your crosshairs. The parabolic trajectory will result in lower hits as the range increases. At some point your group should merge with the top of that thicker tip. Note that yardage for future reference.
Scary Math (actually, it’s a piece of cake)
A Duplex-type reticle can be useful for more than just airguns once its spacing is determined. A ruler helps.
As noted above, my particular duplex tip coincided with a point 3-inches below the crosshairs at 50 yards. Well, at 100 yards, the same gap will equal 6-inches – or six minutes of angle. By good fortune, one inch equals 1 MOA at 100 yards (actually 1.046”, but close enough). This angular measurement is the standard used to quantify rifle accuracy, the adjustment values of many scopes – and the sub-tension of their reticles (the space their crosshairs occupy).
Trouble is, some reticles incorporate diamonds or circles, and even the duplex types aren’t built to a standard pattern. BUT, you can still make one work at longer distance by gathering basic data. And, you won’t need to burn precious ammo.
Reticle Specs – Scope manufacturers often list the values of their reticles via MOA. The number shown for the thin section usually encompasses its entire span (the above example would be shown as 12 MOA instead of 6). To determine the distance from the center of the crosshairs to the lower tip of a Duplex post, just cut the value by half. This is the portion more commonly used to determine hold-overs.
Grid-Target/Ruler Methods – If the above information is lacking, set up on a solid rest located exactly 100 yards from a grid-type “sighting-in target”. Or, tape a ruler beside an aiming point on a large backer. The inch-graduations will translate to MOAs – assuming you can see ‘em. If not, lay out bold lines. Using the above example, my lower Duplex tip would coincide with the six-inch line; 6 MOA.
Putting Duplex Data to Work
Sticking with the above fixed 6X scope…
At 100 yards, the 6 inch/6 MOA gap of the lower duplex post happens to coincide with the drop of many high-speed .22 LR loads zeroed for 50 yards. Although less precise than dialing up 6 MOA with a turret, this method should suffice for cans. (Some scopes are inexpensive types with lower-quality turrets.)
At 200 yards, the same 6 MOA gap will equal 12-inches. That might work for a loopy .45/70, or a muzzleloader sighted in at 100 yards, but how about most flatter-shooting centerfires like the .223? Using a 16-inch AR-15, and 55-grain bullets zeroed at 100 yards, a 6 MOA allowance would corelate with 350 yards. That’s about 22-inches of hold-over! Any mid-range targets would require plenty of guesswork.
Alternate zero yardages are one solution, but what if we could adjust the reticle’s gap to alter its MOA values? Or, maybe, combine both tricks?
Variable-Power Scopes
Nowadays, most of us use variable-magnification scopes. Many are basic 2nd FP types, too. As mentioned, the target will appear to grow larger or smaller as the magnification changes – but the crosshairs will remain the same.
Let’s sprinkle some magic variable scope dust on this fixed 6X and add a 12X setting.
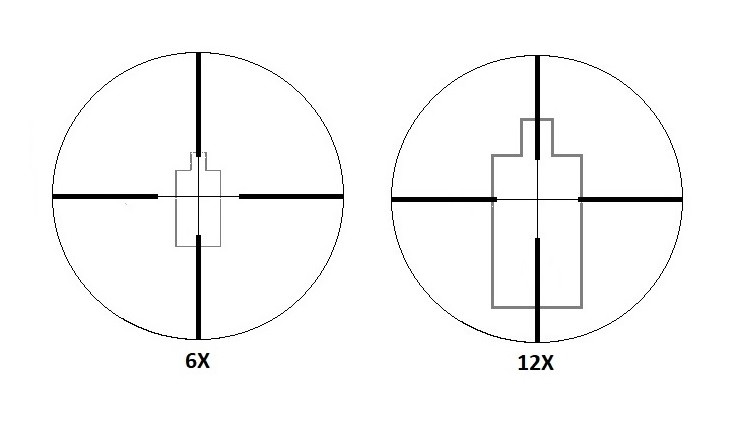
Magnification – Add some power while watching the size of your target increase relative to the reticle. At 12X, it will appear twice as large. As a result, the apparent gap between the duplex tip and crosshairs will decrease from 6 MOA to only half; a much more useful 3 MOA.
Zero – Revisiting the above .223, we could re-zero the same load for 200 yards. At 100 yards bullets should strike roughly 2” high. Out at 300 yards, they’ll drop about 9” – or 3 MOA. Thus, the duplex tip should result in hits – with this particular scope, if set on 12X.
A caveat: Changing magnification will alter the above solution! Actually, that’s not always a bad thing.
Reticles
The above is a hypothetical example, but Leupold’s basic “Freedom” series are for real.
Freedom 3-9X – Leupold lists the “thin opening” of their Duplex reticle at 5.9 MOA on its highest setting and 15.6 on the lowest. Coincidentally, at 9X, the lower gap is once again around 3 MOA.
But, even within the same product series (and reticle) expect the numbers to vary.
Freedom 1.5-4X – The thin sections run 12.6 (at 4X), down to 33.9 MOA. Thus, on 4X, the lower 6.3 MOA half provides a similar value to that of my old fixed-power 6X – less useful for longer range shooting. Then again, a 4X isn’t that kind of scope.
More Glass? Leupold’s 4.5 – 14X VX-3 can stretch the range. I once spent several days shooting prairie dogs with a Duplex version of this scope mounted to a long-barreled .223. At 14X the Duplex gap was only 2.65 MOA. Zeroed at 200 yards, my zippy 40 grain load coincided with the Duplex tip out at 450 yards. The abundant targets in between were hit by splitting the difference.
MOA Notes: Number-crunchers may have noticed Leupold’s MOA Freedom values don’t corelate with their high and low magnification settings. Why? The magnifications are probably approximations used for advertising purposes. Numerous other brands (and reticles) have the potential to sew further confusion but, fortunately, most publish similar specs.
But, what if you can’t find the necessary information? No problem. The various subtensions can be calculated using the above 100-yard target methods. With a variable (like a 3×9) see what happens on both settings (and a few in between).
As noted above though, if you use the Duplex tip for trajectory compensation, changing magnification will alter the results. Same for ranging…
Ranging
If you know the value of your reticle it can serve as an impromptu rangefinder, not perfect but still useful for targets of known dimensions – from a steady rest. Using the above Leupold 3×9, its thinner crosshair opening encompasses 6 MOA when set on 9X. Thus, an 18-inch target should coincide with your Duplex tips at 300 yards. If the same target is bracketed by the lower Duplex tip and center crosshairs, the range should be 600 yards – at 9X.
Some manufacturers add a cryptic numbers to their power-rings which correspond with magnifications. A 3-9X might also display 2-6, the latter reflecting yardages in 100-yard increments, based on a target of constant size. The magnification is adjusted until the target is bracketed, which indicates the yardage. These are hunting scopes, so a 15-inch target could be the baseline – the rough size of a deer’s chest.
Today, I’d rather use a separate rangefinder.
Test Fire Time!
Don’t go to the bank on published velocities. As they say, your results may differ. Bullet types matter. The safest bet by far is to set up for actual shooting. A large white steel silhouette (or several) makes the process easy because hits can be seen out to 400 yards (or further) with many loads and decent scopes.
Procedure – Once again let’s use the above .223/3-9 duplex combination. First, carefully zero for 200 yards. Then set up at 300 yards with the scope on 9X. Fire 2-3 high confidence shots in calm air – but don’t hold high! Instead, put the crosshairs on the same spot you used at 200 yards. The bullets should strike low, somewhere in the vicinity of your duplex tip but probably not spot-on.
If they hit above it, that’s where you’re at. Altering impacts is possible but will require a yardage, zero, or load change.
If the group forms below the tip you’re in business. We can bring ‘em together using the power-ring. While maintaining crosshair alignment with your aiming point, gradually decrease the magnification to “shrink” the target. When your Duplex tip converges with the group note its setting. Shoot a couple more to confirm.
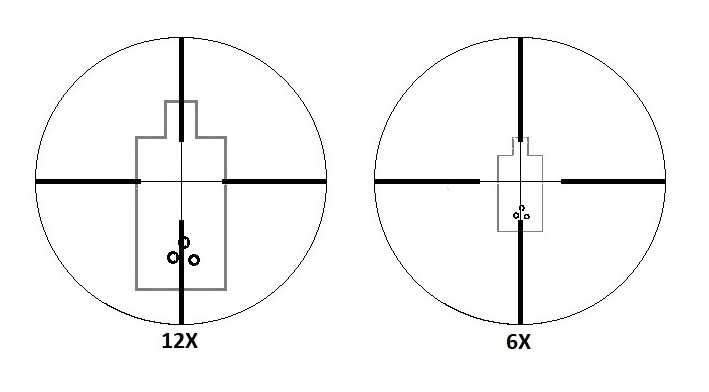
How about a further distance like 400 yards? Same technique but, once again, you’ll need to decrease magnification.
Final Thoughts
The following chart is based, as an example, on the Remington M-700 .308 20″ HB shooting 168 A-Max TAP (2625 fps) with a 200-yard zero.
| Range (yards) | Drop (MOA) | Windage (MOA) |
|---|---|---|
| 0 | *** | *** |
| 100 | 2.1 | 0.7 |
| 200 | -0.0 | 1.5 |
| 300 | -2.9 | 2.4 |
| 400 | -6.2 | 3.3 |
| 500 | -10.0 | 4.3 |
| 600 | -14.3 | 5.4 |
| 700 | -19.3 | 6.5 |
| 800 | -24.9 | 7.8 |
| 900 | -31.2 | 9.1 |
The downside? Your target shrinks as the range increases; the exact opposite of what you’d want. That’s why serious long-range shooters gravitate toward first-focal plane scopes with calibrated ballistic reticles. A 1st FP reticle will synchronize with a target’s image regardless of the yardage for accurate use of its hold-over lines (sometimes in tandem with turret adjustments).
But, here we’re talking about the basic hunting scopes more likely to be on hand. Most have capped turrets designed for sighting-instead of frequent adjustments. I do my share of longer-range shooting using tall turrets and come-ups but I much prefer to leave the zeroes of my sporting types undisturbed.
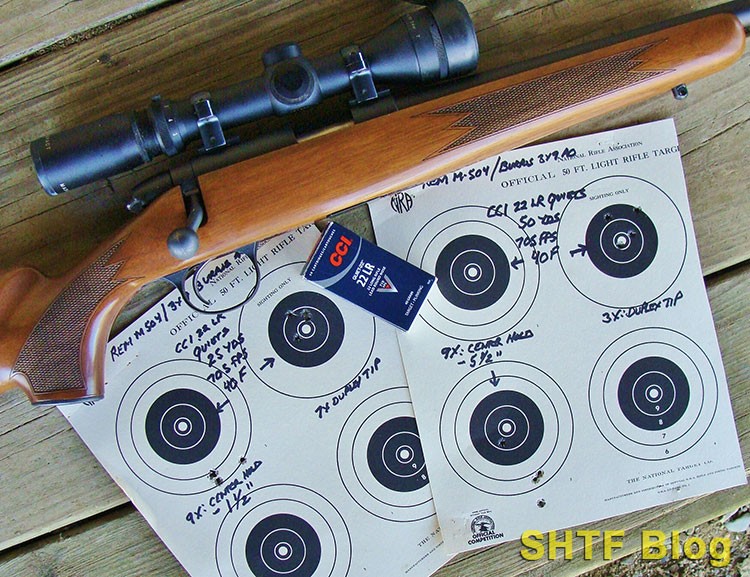
For what it’s worth the above 16-inch .223 trajectory numbers also mirror those of many .308 loads. On the opposite end of the spectrum, CCI’s low-velocity .22 LR Quiets can be fun. To maintain my .22 LR zero, I just shift the scope’s magnification. Its Duplex tip then permits spot-on hits at 25 or 50 yards. This trick alone makes the process worthwhile given the scarcity of ammunition.
