As you all know I’m a bit of a gear nut. I love making my own stuff and I’m constantly experimenting with different ideas and tweaking them and trying to improve on their design. I’m working on a project (you’ll see the post soon) on making a coffee can survival kit for the car. One of the ideas was to do it as cheaply as possible because I hate parting ways with my heard earned money. Part of the kit was a stove, but I wasn’t satisfied with the way the pieces of the stove system fit into the coffee can, so I grabbed a couple of different size cans and started experimenting . The idea was to get the stove and potholder to fit into the pot – all three items had to fit into one can. (That’s the twist.)
The final project used a few recycled cans and some denatured alcohol to fuel the stove. Total cost of materials – 0$.
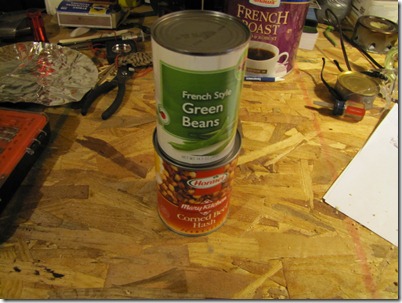
I used a Hannaford Green Beans can for the pot holder and a Corned Beef Hash can for the pot. The stove can be made by following these instructions. The important thing is that the pot holder fit down inside the pot (the corned beef hash can.)
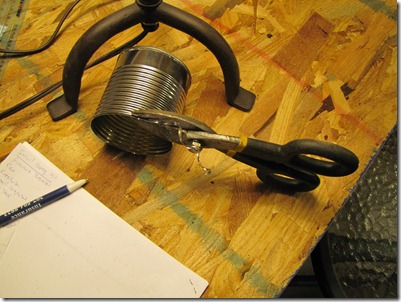
First, eat the green beans and corned beef hash then strip the paper off the cans. To make the pot holder take the smaller can – the one the green beans came in – and using tin snips cut the can down to roughly 2 1/2 to 3 inches in height (below). I used eye protection because little pieces of the can tend to fly off as you cut them. (To get a larger view just click on any of the pictures.)
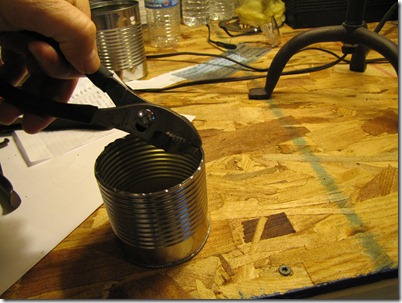
Once you have the can cut to the proper height take a pair of pliers and bend the sharp end down a little. (Below.)
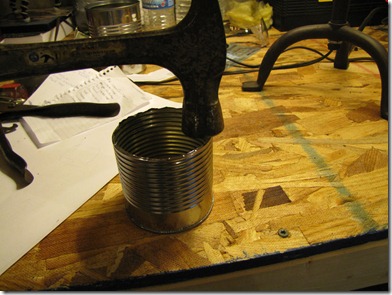
Now that the end is bent over a little take a hammer and gently tap the ends down until they’re just past parallel.
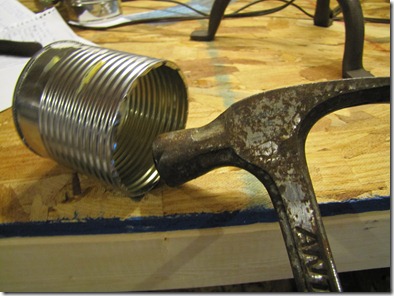
Put the can on it’s side and continue tapping the end down until it’s nice and flat like in the picture below.
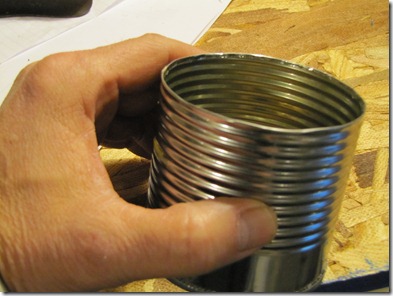
Below you can see the cut portion of the can after I finished folding the top down. Now it’s nice and smooth and you don’t have to worry about cutting your fingers on it.
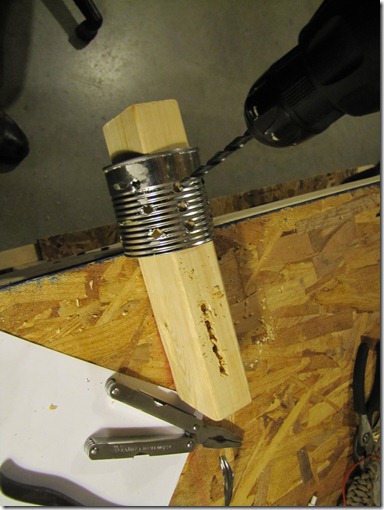
Next, take a drill and put a bunch of holes in the pot holder so that the flame will be able to get oxygen while it’s burning.
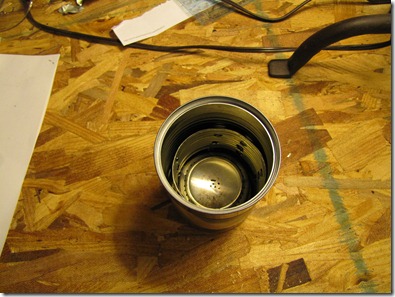
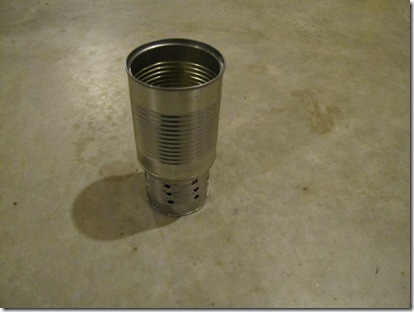
Below is the finished product with the stove added. As you can see it all stacks together quite nicely, which is one of the things I was striving for with this system.
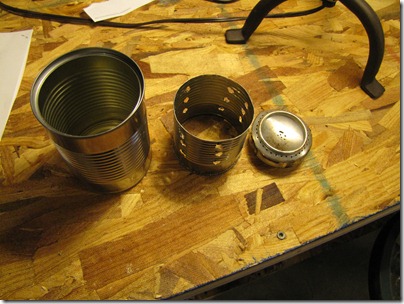
Here’s the pot, pot holder and stove laid out side by side.
When ready to use add alcohol to the stove and light it. Put the pot holder over the stove and then put the pot on top of the pot holder. By a lucky fluke the two cans I used for pot and pot holder actually fit together like a tongue-in-groove and this makes it more stable.
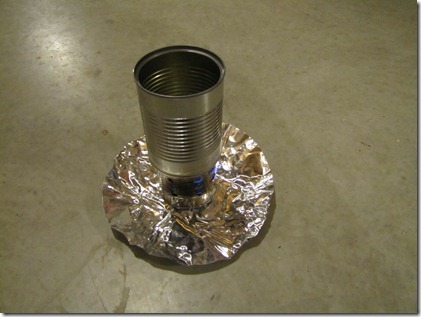
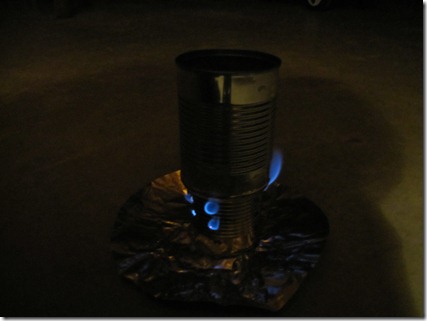
In the two pictures below you can see the pot being used to heat a cup of water.
It took about seven minutes to boil a cup of water, so I’ll probably have to cut some more holes in the pot holder in order to get a faster boil time. As it stands right now it would make a decent simmer ring although it did ultimately boil water as is.
Total time to make the pot holder was roughly 20 minutes.
If anybody has other ideas, modifications or concepts to share please list them in the comments section below.
-Jarhead Survivor
BTW:
Remember how I said you should always have map and compass skills as a back up to your GPS? Well, check out the following story from Fox News:
Death by GPS
If you’re ever wandering around Death Valley with no map, water, or clue don’t say I didn’t warn you!

24 comments
This is cool, but in my gear, it takes up too much space. The way I do my stove is a slight variation the makes it so I dont need the cover or stand. Instead of putting the jet holes on the rim of the can bottom, we put them around the outside of the can. They still turn up and make a nice burner, but they dont get smothered out when you set something on it to cook or heat. I also use a tank style construction instead of the fiber filliment inside. You make a ring of aluminum that fits in the rim of the two can bottoms to form an internal tank, when it starts to heat up, the alcohol gases up and you get preasure. ITs a lil bigger, but still fits in a grenade pouch and is very efficiant. I set my canteen cup right on the stove and it works great with no other parts. The surrounding cover would be handy for light disci[pline, but if things are such I am observing light discipline, I will probly be inside(covered) or not cooking. Great ideas tho, I just do mine different to carry less and have more space.
Hey Spook – I’m having a hard time visualing this–> I also use a tank style construction instead of the fiber filliment inside. You make a ring of aluminum that fits in the rim of the two can bottoms to form an internal tank, when it starts to heat up, the alcohol gases up and you get preasure. ITs a lil bigger, but still fits in a grenade pouch and is very efficiant.
It sounds interesting though. Anyway you could send me a photo? My email is jarheadsurvivor@hotmail.com
No worries if you can’t, but it sounds like an interesting design and like I said, I’m always looking to improve.
When you look at the can bottom, the shape of it creates an apex in the form. ITs the part that has surface contact when you set it down. Make your internal ring so that it fits precisely into that apex on both halves of the stove, this will create a pretty tight seal when you squeeze the two sides together. we cut the ring, make the circle to fit and staple it. In the field you could slot n tab that part so it would hold without the use of a stapler. We use silicone/ RTV to seal it around the bottom, in the field I would probly use gum or pine tar etc.
Oh yea, forgot to mention, we are using the large AZ tea cans. They have a slightly larger diameter which allows for more jets per area. I think this increases your heat yield without exausting your fuel usage. IT will run approximately 15 mins on 1.5 oz of fuel(heet) Ihave also used fingernail polish remover. It works but it is harder to get lit right and not as efficient.
Good stuff Jarhead, I have been making stove sets similar to what you made since I was a kid. One of the little tricks I have learned for obtaining a fester boil time, is to work the top and bottom with a “church key” (the old juice can opener that cuts a triangle hole). For some reason the air circulates much better, and I have had a cup of water boil in 5 minutes. Cools down quick for packing up to.
Hey Chefbear – man, everytime I use a church key I wind up mangling my can! I must be church key challenged or something! I will put some more holes around the bottom though to see if that increases the airflow. Five minutes is what I was shooting for with this stove.
Try using the church key round the edges while the bottom is still in the can, for the open end you can stuff a towel into it to give it more support while punching the holes. That’s how I do it, and it usually doesn’t even bend the can. With the holes in the top and bottom circling the can, it seems to make a vortex of air, making the stove more efficient. I have been able to get the 5 min. boil with about 1 oz of denatured alcohol.
Forgot to mention that I don’t put holes in the sides of the can, except across the top and bottom. Thats how it manages the vortex effect.
The design changes I referenced above gave us a full boil in a canteen cup in four minutes flat. I was really impressed with it myself. My friend is making them (he is layed off and needs entertainment:) and he basicly made one from every design he could find on the web. At present, he is doing a lil r&d to perfect one of these designs and make a prototype of a marketable stove. The goal is to advance this design into a more solid sound configuration with higher grade of materials and get to a manufacturable type of camp stove. we want a multi fuel stove that is the most compact and efficient camp stove available. I ll let yall know if manage it without blowing ourselves up:)
Death by GPS ….. wow, what a great article.
I love technology – all of it and embrace it all. However, I do recognize their limits and do not put my complete faith in them – computer hard drives crash, vehicle electronic fail etc.
There is a side of me that loves the basic, old world solutions because of the simplicity & the fact that we survived thousands of years without the modern electrical, battery operated life just fine.
When I was a kid I was dropped off at the beach & was being picked up at 4 in the afternoon. I learned how to make a sundial & could read it with extreme accuracy. Simple, easy & effective.
It was sad to read about someone’s reliance upon the GPS – which I’d never do simply because I would be fearful of it failing due to electronics, and she paid the price with her young son.
Yes, learn to do without & learn to do with well proven methods of yesteryear – yes, a compass, a map and a clue about potential pitfalls.
I feel sorry for that mom’s loss ….
My brother turned me off to dependence upon GPS technology (thankfully) several years back when he invited me to join him on a “two mile” trek into a back-country lake which he had found on a map. We walked for half a day without finding his lake (taking much deserved shit form me of course) and when we finally topped out on the last “just over the next ridge” there was indeed what appeared to be a small lake off in the distance (next state), which turned out not to be the one he was looking for, but another (in fact a leach pond for a local mine LOL). Of course I respectfully declined to follow his GPS back to my truck, mostly because I actually wanted to GET to my truck, and took a bearing which would send us across country and back to base camp. We walked right past his lake on the way back. It was about a mile from camp. He will never live that one down.
I have a nice gps that I use for geocaching and thats about it. For on the road navigation, I have a tomtom that is quite handy. Other than that, I dont have much use for them.
Am I the only one around who still uses a simple US Road Atlas to get where I am going? I HATE GPS units, I tried using them a few times, not only are the inaccurate but annoying as hell! (Turn left in 600 yds, turn left in 500 yds, turn left in 400 yds, turn left in 300 yds, turn left in 200 yds, turn left in 100 yds, turn left now, at the nearest possible intersection make a U turn!!! REALLY!)
They deffinately hv thier issues. I went with tomtom cuz i can make on sight corrections at the unit. It is not too bad, I like it on the road becuase I get real time mapping as I move. I still use maps and I have a hand held that I use as a big toy, but as general rule, I leave it out of my gear. IF I had to bug, I might grab it till the batteries ran down and then chuck it, but basicly I roll with maps and a compass.
I think the one I tried was a Garmin, a friend let me use it last time I went to see my girl in TN. I ended up just turning the damn thing off and using the atlas. When I started the GPS said it would take 13hrs, with my atlas it took me 10.25hrs and that was driving 5-8 mph over the limit the whole way… no more. I also had to stop for gas a couple times (my JEEP gets thirsty), otherwise it would have been even less.
I have heated a can of beans in the coals of my campfire so I’m guilty of the concern I am about to present. What is in the can and what will be released into your food when it is heated?
I have set up a heater/cooker that serves a similar purpose. I will do my best to describe it without an actual picture: A large can (#10) or something similar to hold the charcoal and act like a windscreen. Punch a few holes in the bottom to allow air in. A small metal riser to hold the cooking pot up off the coals in the bottom of the windscreen pot. A stainless steel pot to heat the water in. Mine was a container designed for kitchen utensils and is about 5.5″ dieameter and about 8″ tall. It sits on the riser in the stove. Put some water in it and another small riser to keep the next container of the bottom of the heated pot. Inside this you put your next container with the food in it. I have a slightly smaller stainless steel pot intended to cook asparagus which fits inside the pot with the water in it with about 1/4″ to spare on the sides. For heat I use tinder, small pieces of wood and usually two charcoal briquits. Iput in 3/4 cup of rice, 1 1/2 cups water, some chicken or beef and some carrots. Let it cook for half an hour to an hour an it is perfect. Doesn’t require any watching the water steams the food without burning it and it continues to cook even when the charcoal burns to ashes. Sounds complicated but it is simple. It’s not a backpacking setup but a much improved hobo stove.
Sounds like a “double boiler” or “bain marie”, the only time you really need to be careful with cans is if they are made of aluminum, tin or have a plastic lining, soldered cans can be a concern because of lead, but they are VERY rare these days.
tin can stoves are a little flimsy, you trade some durability for that light and small size. i’d rather try this > https://www.instructables.com/id/Aluminum-Bottle-Alcohol-Stove/
well thats nice if you you can run out and buy one when that one gets lost, eaten, run over hole shot thru it etc. PRoblem is you probly wont be able to replace it on the fly if something happens to it. These lil stoves are very efficiant and work real well and if it eats itself, you can scrounge stuff off the roadside and make another one. Ive seen all sorts of cool stoves I could buy, but this one i can make out of whatever junk I can find.
Yea, we made the super cat too, it does work and its very simple. The penny stove is way more efficiant and it is worth the extra time and work. When fuel is at a premium, you want all the bang for hte buck you can get. The penny stove gives you that and it is still simple and compact, very light, takes up little to no space. Try one, if you make it work I promise youll be sold.
That is so awesome great job! I wonder if that thing could cook a can of spaggetios, or maybe some chicken noodle soup. I can’t wait to make my own.
About ten days ago we had power outage due to car hitting a pole. My buddy had no lights and after a couple of hrs and starting to get hungry he decided to try it. He reheated some Hambruger healper, cooked mashed potatos and hamburger steaks nad only used like 3 oz of fuel. He cooked a 3 coarse meal on a penny and stove and had dinner by candle light.
I think this mini cooktop is absolutely fantastic & love the low light photo.
I was talking with an old friend from Boy Scouts last night and he reminded me of another thing you can do with one of these simple stoves and a #5/#10 can. While on a camping trip one time we didn’t have the flat-top cast iron griddle that our patrol usually carried to make pancakes on (a staple of any good BSA camping trip!), luckily we had a few empty #10 cans. We both came up with the idea of cutting part of the sides off the cans, so that they resembled a tiny coffee table, place the lit alcohol stove under it, spay a little Pam or other non-stick spray on the bottom of the can (which is now the cooking surface) and cook your pancakes right on the can… works for burgers or whatever you would usually cook on a flat-top grill/griddle to!